Friday, 12 February 2010

Storyboard

here are the storyboard frames for my fable animation.

the total time will be around 1 minute 5 seconds (estimated)

i think my storyboard will be quite challenging and will enable me to show my skills in 3ds max well.
i will be using a number of functions within max that i have not used before which will hopefully enable me to learn many new skills and broaden my knowledge
frame one:
the scene starts in the sky the title emerges within the clouds and then the camera flies through towards the ground, the man is going along the dirt road on his wooden cart, pulled by a horse.

frame two:
the camera zooms in on a puddle and the cart goes through the subsequent liquid movement is shown

frame three:
the cart gets stuck in the next patch of mud and the horse strains to move the cart. the driver realizing he is stuck prays to the god of strength Hercules.
frame four:
the clouds appear and the face of Hercules is visible he then tells the wagoner what he is to do to get out of the mud and be on his way.

frame five:
the man gets out of the cart and helps the horse by pushing the cart from behind. the cart is then free.

frame six:
the man gets back onto his cart and carries on with his journey, the camera zooms back out through the clouds and the moral is displayed in the clouds.


Thursday, 11 February 2010

http://jussing.dk/

at the bottom of the tutorial it shows the authors website linked above

his work is amazing and is an insight to what can be done with 3ds max and animation

Cloud effect

after thinking about my storyboard i have a few ideas for transition and atmospheric effects.
the first i have looked into is the use of clouds and how to create realistic looking clouds in 3ds max

after following a tutorial i have created this fluffy teapot

this is 2 different angles of the same tea pot so the effect works differently at different angles

i think this is a very good effect and with a better opacity map could (i did this one very quickly) it could look very realistic. so i hope to use this for my intro and finish.
i will also be using this effect for my Hercules head in the clouds


if you want the tutorial its a pdf i downloaded ask me :)


Friday, 5 February 2010

wheels


i then followed this tutorial to create the wheels for the cart.
http://www.designnewz.com/tutorials/3d-studio-max-tutorials/modeling/cart-wheel-p1


i have added a lip to the edge of the wheel by extruding the polygons. so when i skin it properly i can add a metal rim.


i have added a peg to the axle as before there was nothing to stop the wheels falling off (obviously this wouldn't happen I'm just obsessed with silly little details) i did this by creating extra lines using the connect tool and moving them to the end of the axle and using bevel as shown in the images to get the taper.

Cart


i once i had selected the fable i am doing i knew what things i would have to model. One of the main base objects is a horse and cart.

i decided i would get his done first.

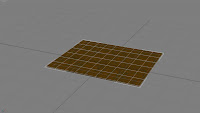
i started by creating a box that is quite thin and rectangular and adding a general wood texture material.
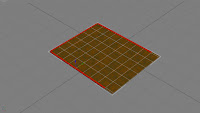
i then selected all the lines in the outer boxes and clicked connect. and moved the lines to the edges to create to create the box the sides of the cart are to be extruded from.
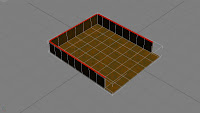
i extruded the outer polygons up
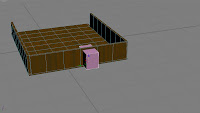
as i wanted it to look like an old cart i needed to create holes in the polygon to make it look like wooden posts.
i did this by creating a box a little smaller than the polygon face. i then copied this box to the other polygons


i added the boolean modifyer in the compound objects tab. i selected the subtraction(A-B) and then clicked the "pick operand B" button and selected the box.


this creates the hole in the object and automatically creates the faces to make it a whole object.


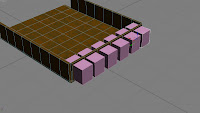
i then flipped the cart upside down to add the foot rest and horse bars.
i extruded two polygons a small amount so i could then extrude the sides of the new box out.


from these sides i extruded the small polygon multiple times so if needed i can shape to the horse


the 2 polygons i extruded before i extruded again to get a platform for the foot rest to be supported by.


i then extended the base out to get the rest at the correct position. to make it wider i used the bevel tool and extruded once more


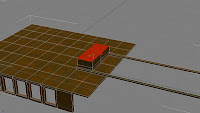
i then created part where the axle and wheels are to connect.
i did this by extruding 6 polygons


i decided to add a little lip to separate the driver from the load of the cart, by extruding the polygons


i also added a back rest in the same way


after thinking about the 3 fables that i narrowed down to. i have made a decision on which i will do..

the cock and the pearl is a very simple story with a simple moral. it would be quite easy to animate so i could put more time into the modelling. but it would be difficult to demonstrate many advanced skills, as the scene is quite basic.

secondly the "the mountains in labour" fable is also basic but i think would involve a conciderable amount of modelling and not alot of more complex animation. as alot of the effects would be camera movement.

i think that the Hercules and the waggoner fable is the best balance between all the different techniques: modeling, animation, camera and the reactor.